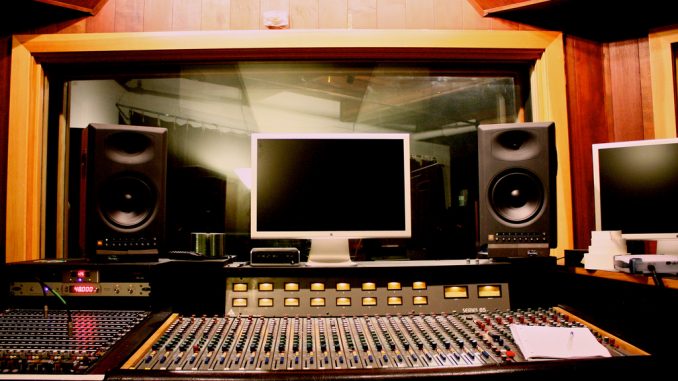
If you plan to record anything in a room, use it for mixing and producing music or even as a home theater or listening room, the chances are you’re going to want to set up acoustic panels. Any home studio worth its salt is going to have some form of acoustic treatment, and there are some ways to make your own without going to excessive expense and without too much effort.
Working out whether you need an acoustic panel setup is a pretty simple. If you record any sort of audio for professional use, recording vocals or instruments, working on podcasts and voiceovers, anything where you need clear audio. Some people underestimate the merits of a room where the acoustics are what we call ‘dead’, but the truth is, you can have the best microphone and best vocalist in the world, but recorded in a room with horrible acoustics, it will not sound good.
What Do Acoustic Panels Do?
Acoustic panels are basically designed to ‘soak up’ the sound. In the world of audio recording, we want to get rid of as much reverberation or echo as possible, and for the room to be as ‘dead’ as possible. A room where you clap and hear reflections is not what we need. If you want reverberation on your sound, for instance, you can add it later in post production, but you want that to be your own choice.
The vibrations of sound don’t travel as well through certain materials. Acoustic foam is ideal, but having fabrics and furniture such as couches, cushions and even duvets in the room will help to stop the sound bouncing back.
Building Acoustic Panels vs Buying Acoustic Panels
If you’re a dab hand when it comes to DIY or have any experience building things, or if you’re just a keen amateur with some tools and a home studio, building your own acoustic panels is a very real option, but a lot of us will opt for buying the best acoustic panels we can find. There are pros and cons either way.
Building acoustic panels can be great, and lets you customise things such as the size, allowing you to create something bespoke for the room you are placing it within. Another benefit is the fact that building your own can save you a bit of money.
There are advantages to buying acoustic panels though, there is less room for error due to just having to fit them rather than make the whole thing, and of course there is a lot less work involved!
How to Make Acoustic Panels
There are a couple of options in terms of materials for making your own acoustic panels. You can purchase ready made acoustic foam which is excellent quality and has been road tested, meaning you can rest assured that its results are going to fit the bill. We have some recommended acoustic foams below for you to look at if you plan to go down this route. You can fit them within frames or simply mount them to the wall.
If you don’t want to go to the expense of acoustic foam, there is an alternative! Owens Corning is a fiberglass material that does a good job of soaking up audio. You’ll definitely want to frame it and cover it. Follow these steps for making your own affordable acoustic treatment:
- Make a frame out of wood. Owen’s corning will often come in 2″ and 4″ thicknesses, so finding wood that is the same thickness will allow you to create a frame. Cut it to size and create a frame using hammer and nails, you can connect with the nails directly through the wood, or use corner brackets.
- Fill the frame with the Owens Corning 703 or 705. You can put superglue around it or even tack it to the insides of the frame to make sure it stays in place. Remember, this won’t be seen, so you don’t have to worry too much about how neat it looks, you just don’t want it to be rattling around within the frame.
- Cover the frame with fabric. Not just any fabric, if you use leather or vinyl for instance, the absorption properties will be greatly compromised and will not be anywhere near as effective. Only one side of the frame will be visible, so the back doesn’t have to be too neat. Pull the fabric tight around one side and staple it in place.
- Using mounting brackets, affix to the wall in the desired place.
List of Materials:
- Owens Corning 703/705 or acoustic foam.
- Fabric for covering the frame.
- Staple gun and scissors for cutting and fixing the fabric in place.
- Wood the same width as the Owens Corning or acoustic foam.
- Hammer and Nails with corner mounts optional (but recommended).
Recommended Acoustic Foam Panels
If you’re not going down the Owens Corning route, there are plenty of great panels out there which you can either mount or frame and then mount depending on your own personal preference. Frames can be made in the same way and whether you cover them or not is a case of personal choice.
AURALEX ACOUSTICS D36 ROOMINATOR KIT
This is sold as an acoustic panel kit for home cinemas but works equally well for a recording room. Some acoustic panels are marketed as being for a certain use, but in reality, they all do a very similar job and will work just as well for the other uses. The roominator kit gives you a lot of different professional panels with a sound diffusing design. These do a great job of dampening the sound and have a lot of good reviews. They work on their own and can be mounted as they are, but putting them in a frame is another option and can make them look very cool.
Mounting Your Acoustic Panels
Whether you buy or build, and however you choose to build, mounting your acoustic panels is a huge part of the process, and is inevitably something you are going to have to do. There are a few different mounting options and each one has its different pros and cons, as well as leaving different residues on your wall afterwards should you need to remove them. It is also worth considering if the mounts have any effect on the panel, and any resale value after you’re done with them.
Tack. One of the most simple ways to mount your acoustic panels is with tacks, these can attach to the back of the panel and then stick onto the wall, and though there is the chance they will need a bit of cleaning up (adhesive) after removal, this isn’t going to have a lasting effect. The only real problem here is finding something strong enough to hold the weight of your panel.
Impaling clips are another good way to mount the panels, especially if using foam. You can mount it really simply by attaching the impaling clips to the wall and them simply ‘impaling’ the panels through them. This is a sturdy way to keep them in place and is good for supporting weight.
Positioning Your Panels
This is another key part of the process. Choosing where to put panels can be tough, but as a rule of thumb, between 1/4 and 3/4s of the wall should be covered. As briefly mentioned, this depends what else is in the room. If it is a large, bare room then you will want to quite heavily cover the walls, but if there are already things like couches in the room diffusing and dampening the sound then you may not need as much coverage.
Where you place your acoustic panels depends on the use of the room, and of course the characteristics that the room already has. If you plan to use it for mixing and producing music then you will want to think about your speakers, and probably place the acoustic panels at the ‘first reflection’ points, or areas where the sound hits first and is reflected from. Generally, more absorption is better, but you can always tweak in the future to perfect the sound and add more acoustic panels if needed.
If you are putting the panels in pace for recording then it is definitely a case of more is…well, more. You want to kill the reflections as much as possible, and may even wish to twin your acoustic treatments with a vocal “reflection filter” or a sound absorbing microphone panel which ensures that the sound is being picked up from the source of the sound, not any reflections coming from the wall, floors and ceilings.
The video below explains a lot of how sound works within rooms and can help you to understand what is required to dampen a room and turn its acoustics into something that will work for your music.
Acoustic Treatment has a lot of science involved, but trust me when I tell you that it is an art, and as such, is something you can tweak and perfect. No two rooms are ever the same and finding what works for you can be difficult, and can also require a lot of sitting and listening to sounds and performing acoustic ‘clap tests‘.
Bass Traps
Bass traps will be covered in detail elsewhere on subreel.com, but they are worth considering at this stage. Bass sound waves and the ‘low frequencies’ are a lot stronger and take a lot more to ‘trap’. You can make your own bass traps too, or buy them from one of the acoustic specialists such as Auralex. If you set up your acoustic panels and are still struggling, setting up a treatment for the bass sounds may help you out of a tough spot.


